Venue - Collections - Set up Quick Shop on your store
This article will cover the setup of Quick Shop, which is available on Venue version 7.0 and higher, unsure what version you have? Check out Shopify's guide on finding your current theme version here.
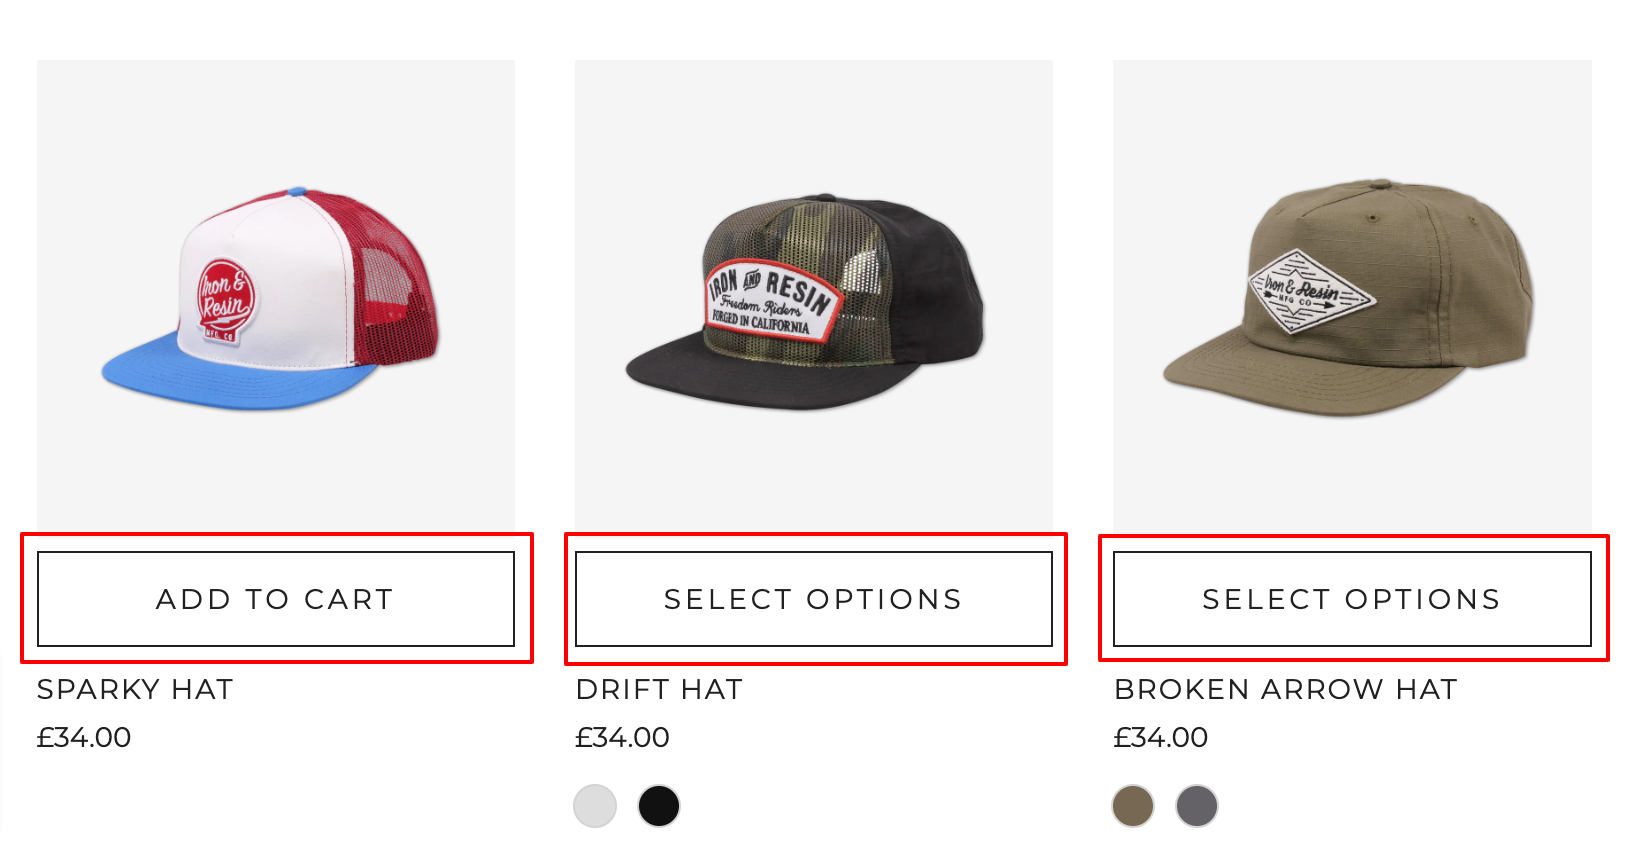
Quick Shop is a product quick view style feature that will display a pop-up modal on your product grids where customers can view and select products.

How to set up Quick Shop
When you install Venue version 7.0 or above, Quick Shop will be automatically enabled for you. This section will bring you through the steps for finding this setting.
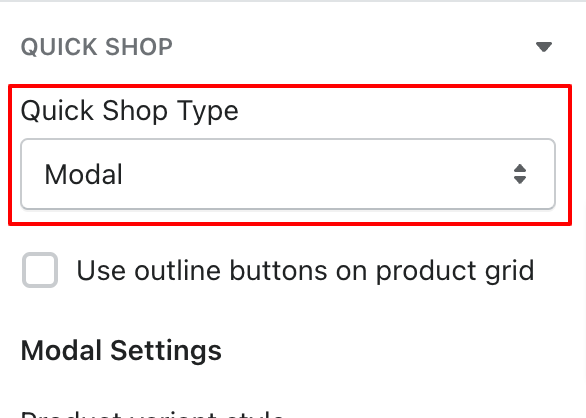
From here, click on Theme Settings in the bottom left corner followed by Quick Shop.
- Modal - This will activate the Quick Shop pop-up on product grids.
- Button - A button will appear on the product images which will bring the customer to the product page.
- None - No modal or button will appear, customer access the product page by clicking the product image or product title
Information
The option that you select here will be activated across your storefront, at the moment, there is no way to apply a different setting to specific product grids.
Customization options for Quick Shop modal
The Quick Shop modal comes with a range of settings, allowing you to customize it to your store's needs, this section will bring you through each setting.
From here, click on Theme Settings in the bottom left corner followed by Quick Shop.
- Product variant style - Here you can choose how your product variants are displayed, the Buttons and Dropdowns options are automatically available, to set up color swatches, please see the article linked below
- Enable quantity selector - This will activate a quantity selector within the pop-up modal, allowing customers to choose the amount of one product selection that is added to the cart.
- Show dynamic checkout button - A payment button will appear that allows customers to go directly to the checkout, this button will be specific to each customer's preferred payment method, to learn more about this, click the link below:
- Show tax notice - Selecting this will show relevant tax information for each product.
- Show inventory notice - This will display a notice on the product modal when your product reaches a pre-determined stock level.
- Low stock notice threshold - Here you can use the slider to select the stock level where the inventory notice will be displayed.


- Show cart after adding product - Selecting this option will show the customer the cart each time they select "Add to cart." This option is disabled automatically meaning that the customer can continue to add products and only visit the cart page when editing the product selection or moving into the checkout.
Shopify Help Center - Dynamic checkout buttons


Select the options that you would like to have enabled on your Quick Shop modal.
Click Save and check your work.
Insight
We think that you’ll love Quick Shop so much that we’ve dedicated an entire blog post to it, visit it at the link below and find out how Quick Shop can streamline your customer's shopping experience!
Safe as Milk blog - Meet Quick Shop - the fast lane to more sales