All themes - Theme settings - Display a free shipping bar
IMPORTANT: You must add a price-based condition to your free shipping rate in Shipping & Delivery in the admin in order for your customers to get the free shipping you have promised using the shipping bar. Adding a figure in the shipping bar settings in the theme editor is only half of the process. Please read the Shopify help article for help setting up a free shipping rate.
With Safe As Milk themes you have the ability to display a free shipping bar in your store. A free shipping bar is designed to encourage shoppers to add more items to their cart and reach an enticing free shipping threshold. It's a proven strategy to help increase the AOV (Average Order Value) of your store.
The bar can be displayed in the following areas:
- In the cart drawer and on the cart page
- On the product page
It is also possible to set up individual minimum purchase amount per market - which we will outline towards the end of this article.


IMPORTANT: You must add a price-based condition to your free shipping rate in Shipping & Delivery in the admin in order for your customers to get the free shipping you have promised using the shipping bar. Adding a figure in the shipping bar settings in the theme editor is only half of the process. Please read the Shopify help article for help setting up a free shipping rate.
Add a shipping bar to the cart drawer and cart page
- Head to the Online store > Themes section of your store admin
- Click the Customize button next to the theme you wish to edit
- Once the theme editor is open click on Theme settings (cog icon) in the top left of the editor
- Click on the Free shipping bar accordion/section in the left hand menu
- Here you can set up your free shipping minimum spend (matching the free shipping rate you have set up in the admin) - make sure these figures match exactly.
- You can also choose an icon, text alignment, an animation on target completion and the color of your shipping bar (solid or gradient)
- In order to display the shipping bar in both the cart drawer and cart page click on the Cart area of the theme settings and check the Enable free shipping bar checkbox


Add a shipping bar to the product page
- Head to the Online store > Themes section of your store admin
- Click the Customize button next to the theme you wish to edit
- Once the theme editor is open navigate to any product page
- From here you can add a Free shipping bar block - which has some unique settings of its own independent of the main settings.
Note: The confetti animation does not fire on the product page - only in the cart drawer and on the cart page.

Set individual minimum purchase amounts per market (advanced)
It is also possible to set up individual minimum purchase amount per market.

Set up the metafield:
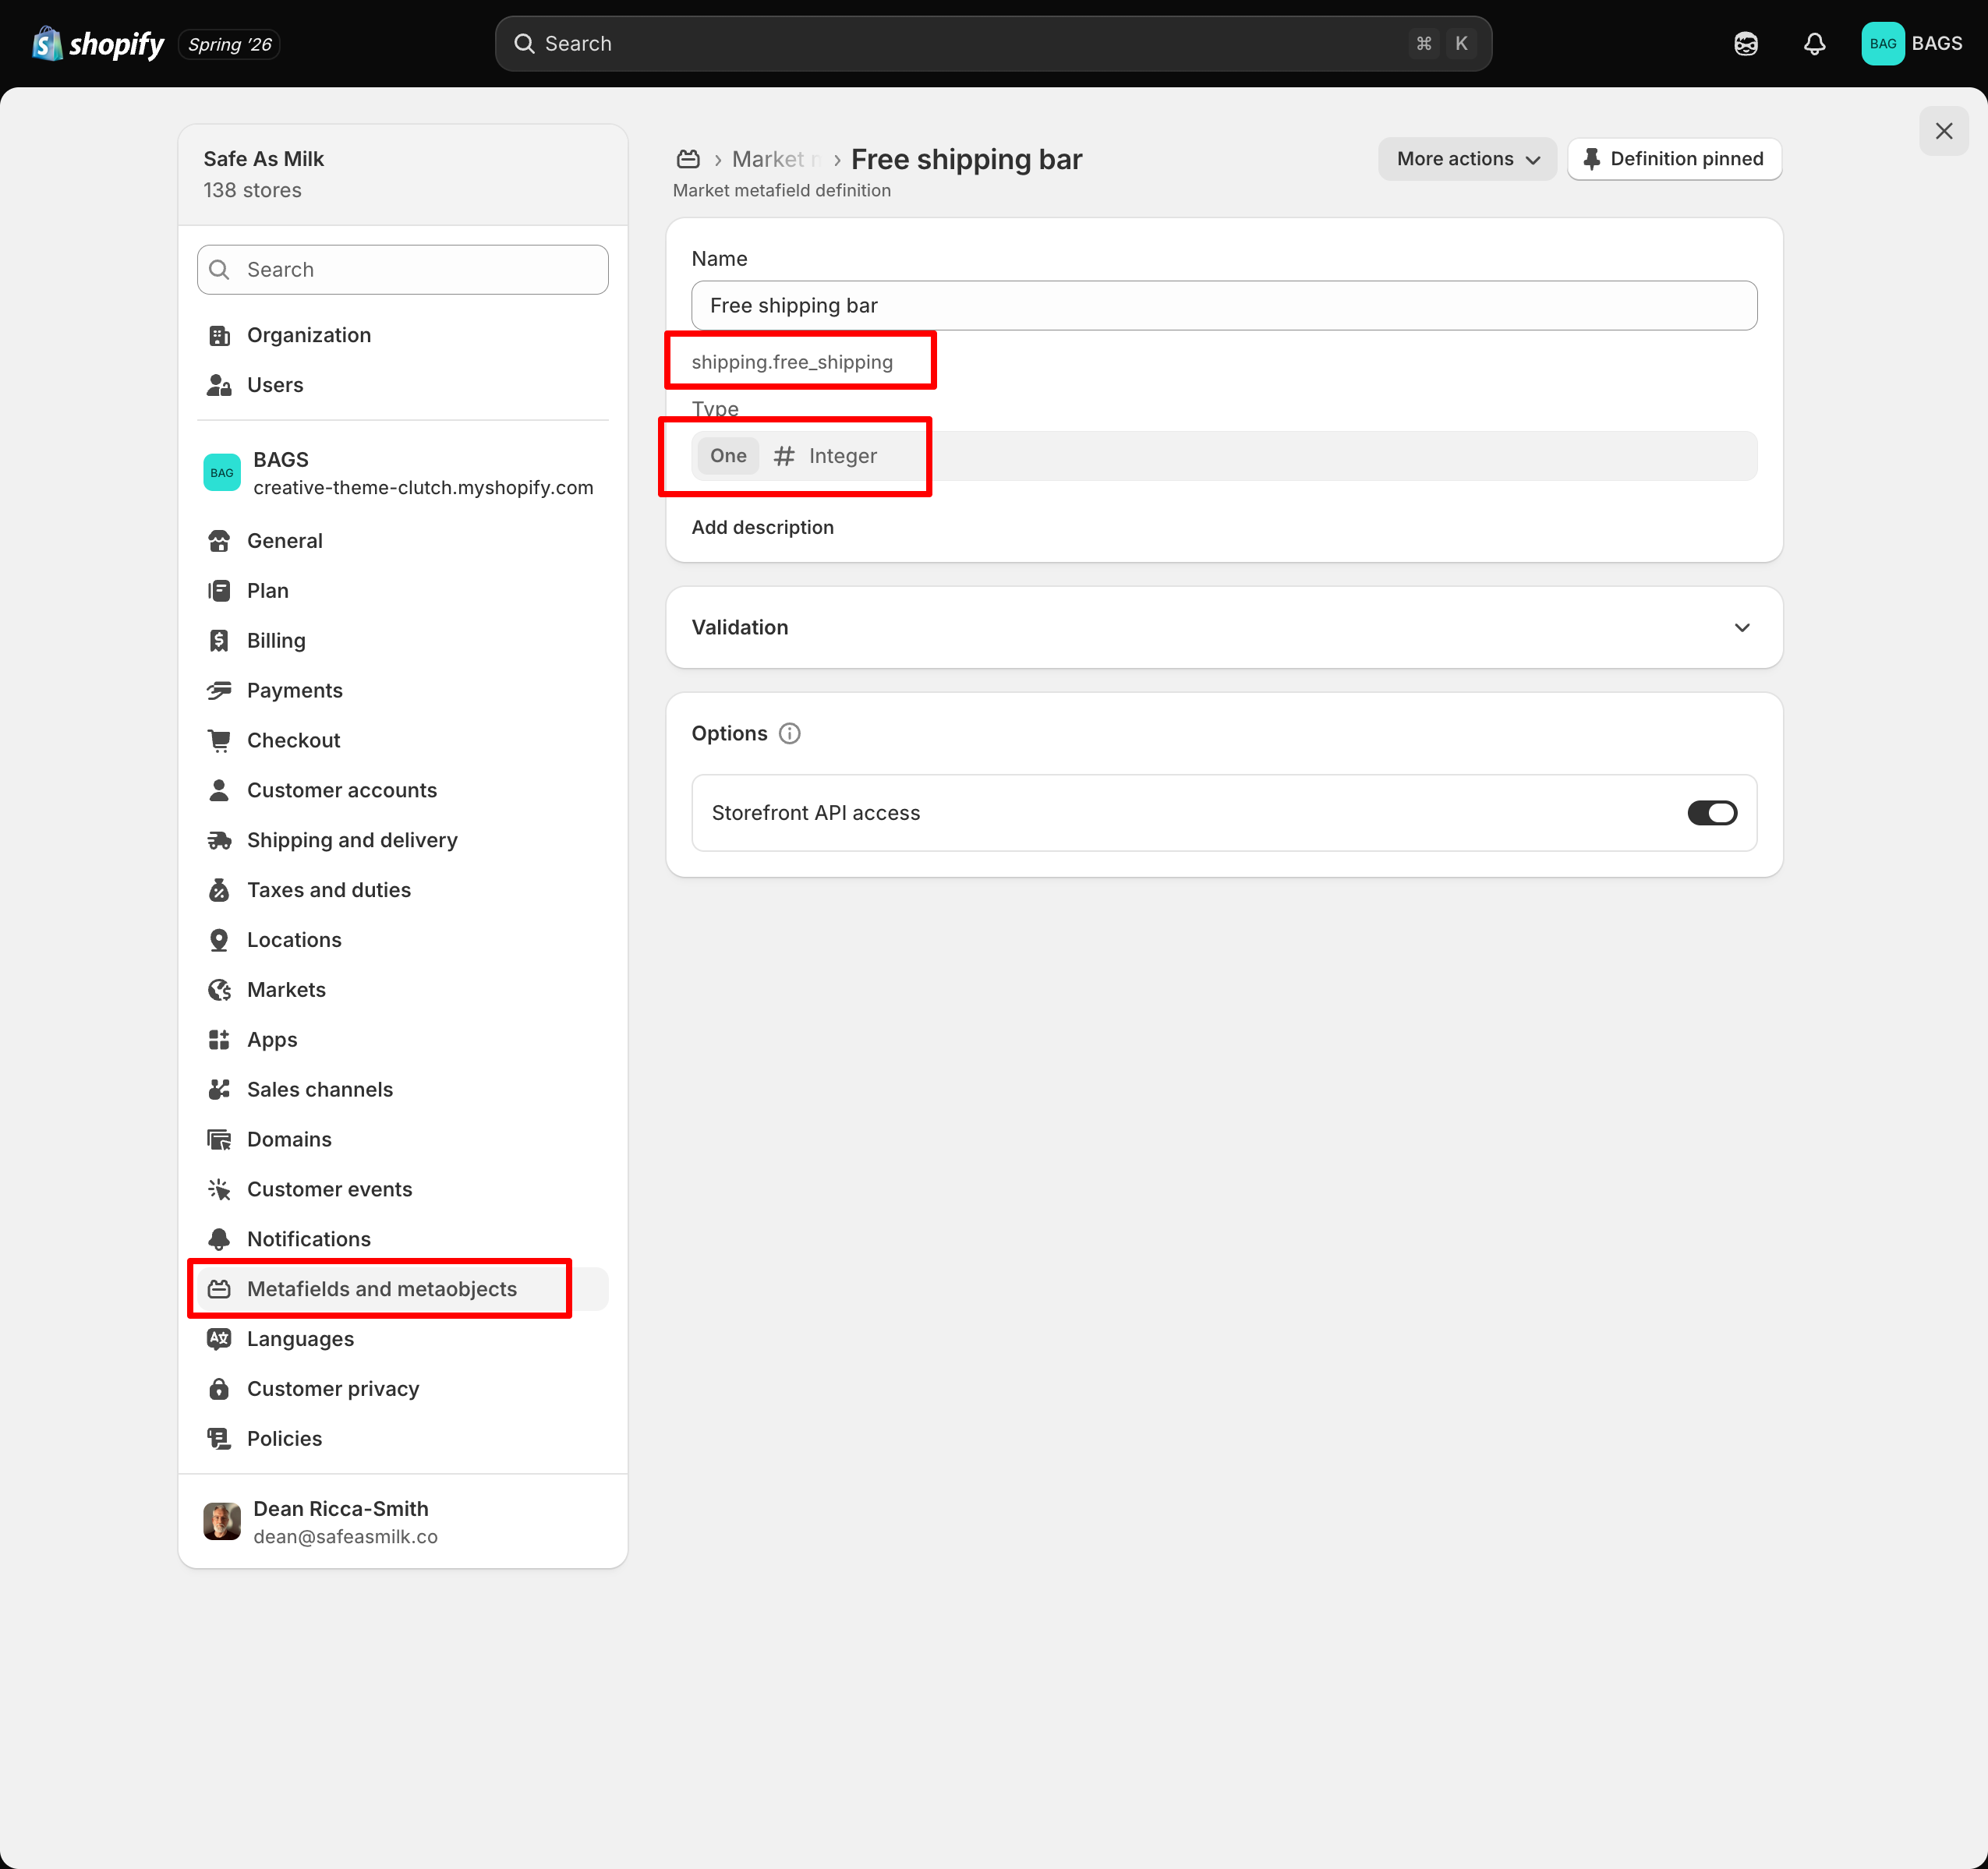
- Click the Settings cog icon in the bottom left of the admin screen
- Click Metafields & metaobjects in the sidebar menu
- Click Markets from the selection of metafield types
- Click the Add definition button, top right of screen
- In the 'Name' field type ‘Free shipping rates’ - or whatever suits you
-
After you have entered a name you'll see the namespace and key field directly under the Name field - you need to click that text in order to edit the namespace and key field
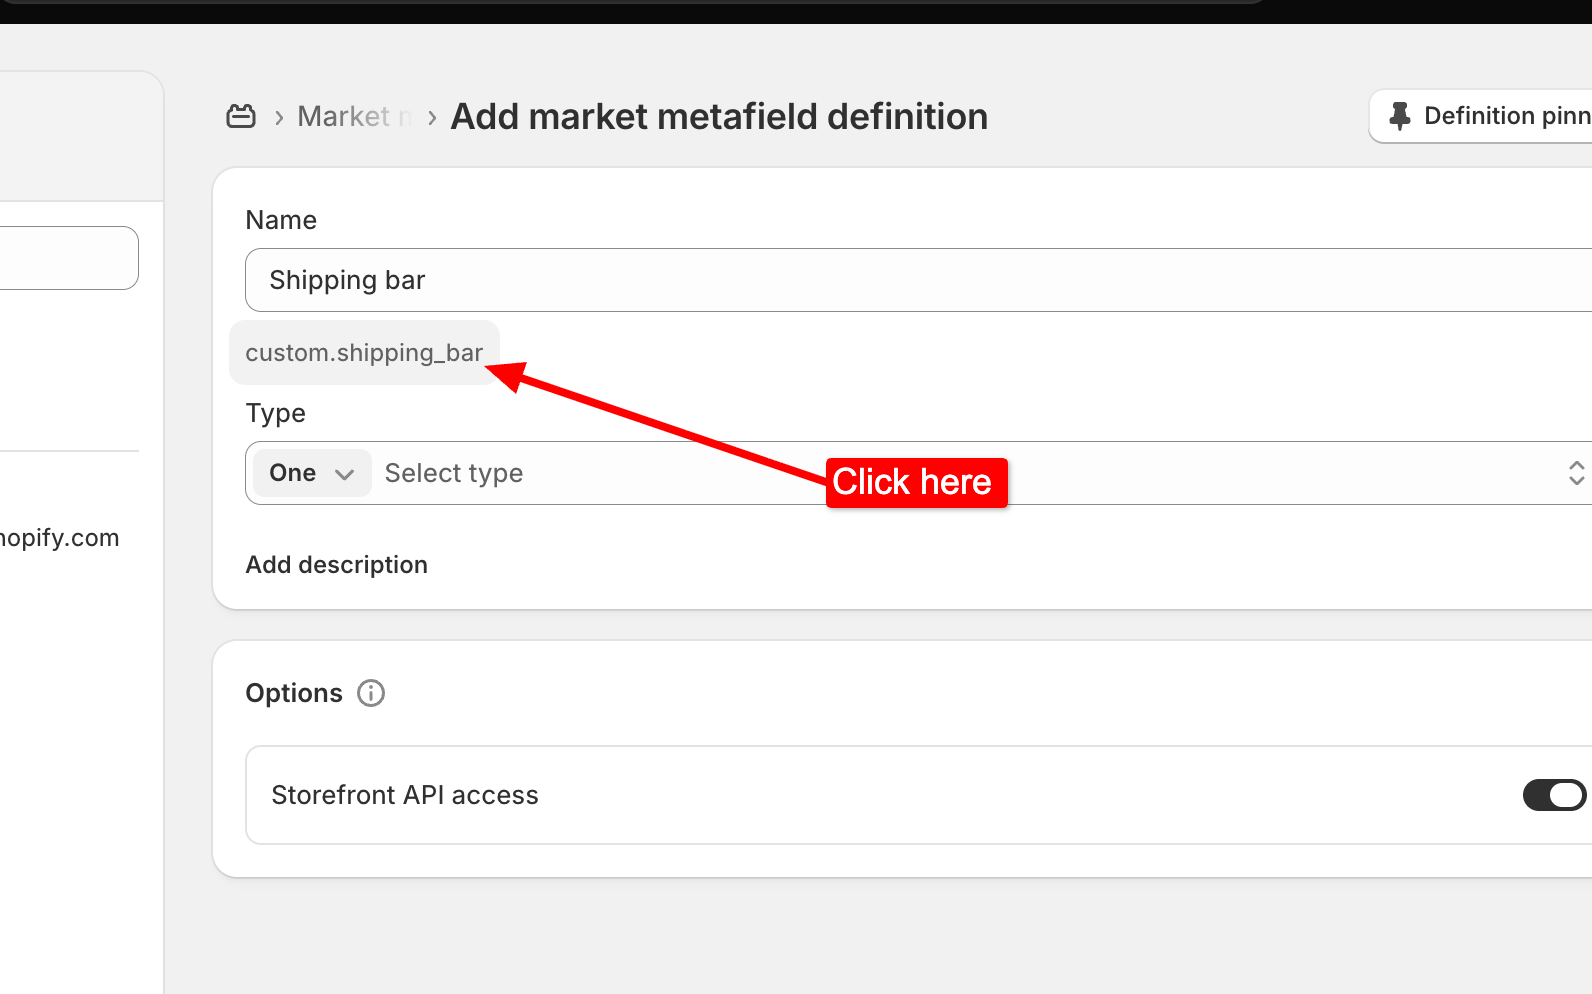
- In the now visible 'Namespace and key' field - type shipping.free_shipping - use these words exactly in this format
- Click on the + Select type button and choose Integer

Connect it to your markets:
- Click Markets in the sidebar menu
- Click into the market you wish to edit
- Look for the metafield you have created and click into that
- Enter the target spend figure for that market i.e if it is UK then 600
- Save your work and test it's working as expected
Important: You must add a price-based condition to your free shipping rate in Shipping & Delivery in the admin in for EVERY market you have set up the free shipping metafield for. Please read the Shopify help article for more on this.
Hide the shipping bar for certain markets
On Venue versions 12.0 and above, if you set the metafield value to -1, the free shipping bar will not show for that market.
